Where Observation Stops
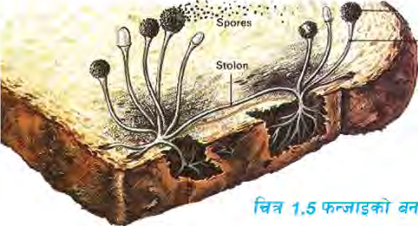
When a piece of mouldy bread is placed under a microscope, the thin thread like hyphae, the anchoring rhizoids and the dark round sporangia at the tips all become clear. Structure that the naked eye could never pick out is suddenly visible. But observation shows only what is there. Whether that fungus grows faster in a warm cupboard, or which substance stops it growing at all, is not something the eye can settle.
The same limit shows up even more sharply with chemicals. Put three clear liquids into three test tubes. All three look alike. The eye cannot say which one is an acid, which is a base and which is a salt. Observation carries us as far as a guess and no further. Deciding whether that guess is right is a separate piece of work, and that work is what this lesson is about.
The Guess We Call a Hypothesis
From what we observe, we make guesses. Lemon juice tastes sour, so a natural guess is that lemon juice is an acid. Soap water feels slippery, so a natural guess is that soap water is a base. In scientific learning, a guess made in this way is called a hypothesis.
Hypothesis: a guess made on the basis of observation. It may turn out right or wrong, and it may not be treated as settled until it has been checked.
A hypothesis that turns out to be wrong is not a failure. Once it has been checked, a wrong guess still moves us towards the right answer.
What Testing Means in Science
To find out whether a guess is right or wrong, a definite scientific procedure is followed and the guess is checked, either in a laboratory or outside it. This scientific checking is what we call testing. In science, a test is a form of practical work. Substances are handled, mixed, heated or brought into contact with an indicator, and whatever happens is written down exactly as it happened.
Test: the practical work of checking, through a definite scientific procedure, whether a hypothesis is right or wrong.
Planning a Test Before You Start
Before any test begins, you must be clear about what is being tested. You must also be clear about the hypothesis that goes with it. Once those two are settled, the rest of the plan follows.
- Fix the objective of the test.
- Decide exactly what is going to be tested.
- Decide how the test will be carried out, step by step.
- List the materials that will be needed.
- Plan, in advance, how the information obtained will be presented.
Indicators and Litmus Paper
To tell acids, bases and salts apart, science uses substances called indicators. The most common one is litmus paper, which comes in two kinds, red and blue. Its colour changes according to the nature of the substance it touches, and that colour change is the signal that gives us our answer.
Indicator: a substance that signals whether another substance is an acid, a base or a salt by changing its own colour.

Testing for Acid, Base and Salt: The Method
The title of this test is: Testing for acid, base and salt. Its objective is to sort the given substances into acid, base and salt with the help of an indicator. These are the materials it needs.
- Lemon juice
- Soap water
- Salt water
- An indicator, that is red and blue litmus paper
- Test tubes
Once the materials are ready, the method runs like this.
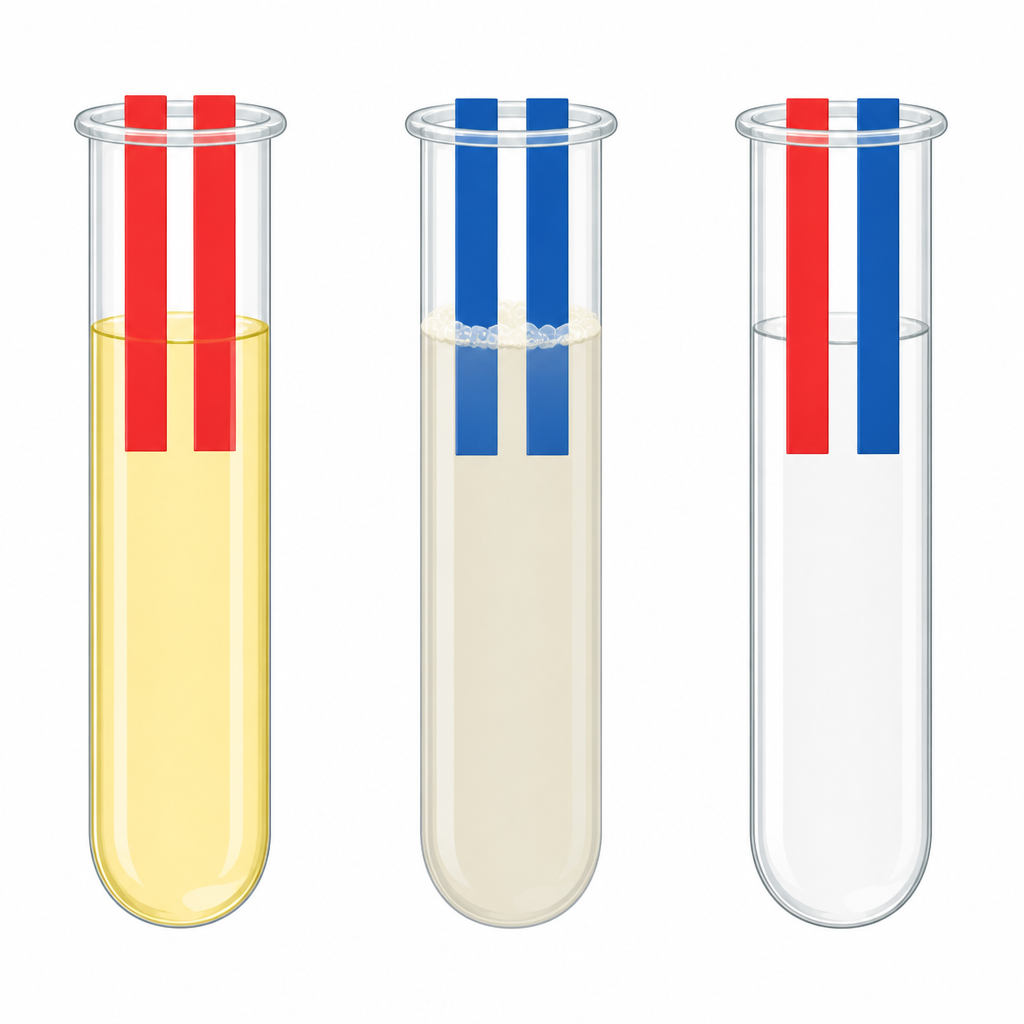
- Step 1: Put the lemon juice, the soap water and the salt water into three separate test tubes.
- Step 2: In the tube holding lemon juice, dip first a red litmus strip and then a blue one, and watch what happens to each strip.
- Step 3: Repeat the same dipping, first red and then blue, for the soap water.
- Step 4: Repeat it once more for the salt water, and write down each result the moment you see it.
Never taste anything that is in a test tube, and never put your nose over the mouth of a tube to sniff it. Hold litmus paper with clean fingers or with forceps, and never dip a strip that has already been used into a second tube.
What the Litmus Papers Showed
The results of the reactions are written straight into a table in the practical notebook. In a table you can see at one glance which strip did what in which substance. Here is what this test showed.
| Indicator | Lemon juice | Soap water | Salt water |
| Red litmus paper | No change in colour | Turned blue | No change in colour |
| Blue litmus paper | Turned red | No change in colour | No change in colour |
Reading the Results to a Conclusion
A filled table still has to be read, and reading it needs a rule. The behaviour of litmus is set out below.
| Kind of substance | Red litmus paper | Blue litmus paper |
| Acid | No change | Turns red |
| Base | Turns blue | No change |
| Salt | No change | No change |
Now the conclusion follows easily. Litmus turned red with the lemon juice, so lemon juice is an acid. Litmus turned blue with the soap water, so soap water is basic. No colour change appeared with the salt water, so salt water is a salt. The hypothesis that came out of observation has been checked by testing, and it is no longer only a guess.
It is wrong to say that an acid makes red litmus red. Red litmus is already red, and nothing changes in it. The signal for an acid is blue litmus turning red.
Writing the Report of a Test
A test is not finished until its report is written. Reports can follow different formats, but every good format does the same job: someone who was not in the room can read it and understand exactly what was done. The parts below make up the format that is most often used.
Title: the name of the test, for example Testing for acid, base and salt.
Objective: to sort the given substances into acid, base and salt with the help of an indicator.
Materials: lemon juice, soap water, salt water, an indicator (red and blue litmus paper) and test tubes.
Method: what was actually done, written as work that has already been carried out.
Observation: the results in a table, exactly as they appeared.
Conclusion: the final answer the observations point to, with the reason stated.
One thing to notice is that the language of the method changes when it goes into a report. While giving instructions before the work, you write "put the liquids into the tubes". In the report, written after the work, you write "the given substances were put into three separate test tubes". In the conclusion too, the reason for the colour change is stated and never left out.
Another Fact Worth Testing
The fact that an acid and a base react chemically to give a salt and water can be checked in exactly the same way. You do not have to accept the sentence simply because it is written down. With the teacher's help, state the hypothesis, fix the objective, gather the materials, follow the method, record the results and write the report. That is how the habit of testing is built, and a student who can check what they have read is a student who is really doing science.
Working Safely in the Laboratory
Because tests are carried out in a laboratory, the discipline of the laboratory is part of the test itself. If a classmate were entering the laboratory for the first time, this is the advice worth giving.
- Touch no substance and no apparatus without the teacher's instruction.
- Hold a test tube with its open mouth pointing upwards, never towards yourself or anyone else.
- Eat nothing and drink nothing inside the laboratory.
- When the work is over, clean the apparatus, put it back in its place and wash your hands.
- Take care with sharp instruments such as forceps.
If any substance gets on your skin or into your eyes, wash the place at once with clean water and tell the teacher immediately. Do not try to deal with it yourself.
The full lesson is waiting for you
The notes are free to read in full. A free account opens the rest of the practice, and tracks your progress and confidence score for every subject. Presentations and videos need approval from Learn Yeti.